1. Introduction
Picture this: you reboot your computer and instead of your familiar desktop, you’re greeted by a black screen with nothing but grub rescue> blinking at you. Your computer has essentially become a very expensive mirror.
That’s exactly what happened to me during my latest attempt to finally make the switch from Windows to Linux after 14 years of wanting to. I’d tried multiple times before with dual boot setups on distributions like Debian (on servers), Ubuntu, and Linux Mint, but I wasn’t ready to give up gaming (especially League of Legends). Recently, I got targeted by “Why Windows sucks” content and decided to make an ultimate try to switch to Linux.
This time, I thought: “if I want to switch, why not embrace it fully by trying Arch Linux?” I wanted to understand the fame behind “I use Arch btw” and determine if it was really THAT complicated.
I booted from a USB with the Arch installer, followed the Wiki and watched a YouTube video, and successfully installed it. But spoiler alert: I had no UI. I needed to install either GNOME or KDE Plasma. Not so hard, except for one problem: I didn’t have internet working on my new installation (which I didn’t understand because it worked during the Arch install). So I had to redo the installation, and before finishing the Arch install process, I installed the networkmanager package that was missing to have internet connectivity after booting into the system.
This is when I understood the “complexity” behind Arch Linux or Linux in general. Even if it seems easy, you might have to fix something here or there.
I didn’t like KDE Plasma at all and it didn’t inspire me to use my desktop more. Since I’d heard a lot about Hyprland, I wanted to give it a try. When I got an error with nvidia_drm while using Hyprland, I tried a few troubleshooting steps. ChatGPT suggested some commands to properly setup GRUB (a bootloader), but I didn’t realize I already had another bootloader configured.
Here’s where things went wrong: I was actually using systemd-boot as my bootloader (which gets installed by default in many Arch installations), but I installed GRUB on top of it without realizing the conflict this would create.
What are bootloaders? Think of bootloaders as the program that starts your operating system. GRUB and systemd-boot are two different bootloaders that do the same job but work differently. Installing one over the other without proper cleanup is like trying to install two different steering wheels in your car - it’s going to cause problems.
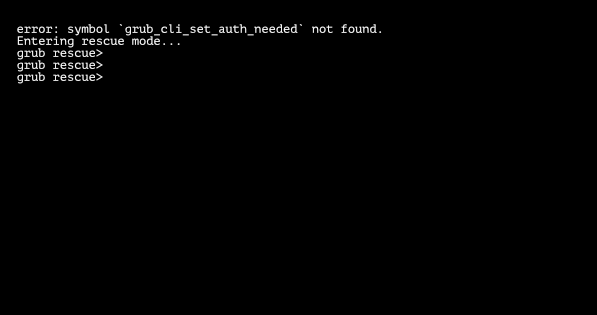
After rebooting my computer, I was stuck on a black screen with grub rescue>.
2. How Did I Solve It?
At this point my computer was basically a very expensive mirror. But fortunately, I had a live USB with EndeavourOS - that USB saved the situation!
⚠️ Warning: The operations described below involve modifying your bootloader and system files. If done incorrectly, they can make your system unbootable. Always ensure you have backups of important data before attempting these fixes.
Here’s what I did (simplified for storytelling, but technically accurate):
1. Booted into the EndeavourOS live session
This is the Linux equivalent of calling a friend when your car breaks down. You don’t fix it on the highway; you tow it to a safe place first.
2. Mounted my Linux partitions
Basically, I told the live system: “Hey, this /mnt folder is actually my real system’s disk.”
3. Chrooted into my installation
Chroot is like saying: “Pretend this folder is the root of my OS and let me act as if I had booted into it.” It feels a bit like Inception: I was in EndeavourOS, pretending to be inside my broken Arch, to fix it from the outside.
4. Reinstalled GRUB properly
This was the crucial step. The problem was that I thought I was already using GRUB when in fact my system was booting with systemd-boot. Installing GRUB over it corrupted things, so the solution was:
- Remove the broken EFI entries
- Reinstall GRUB cleanly
- Regenerate its configuration
5. Reinstalled the Linux kernel
Turns out my /boot didn’t even contain a kernel image anymore. No wonder GRUB didn’t list Linux as an option! Once I reinstalled linux and linux-headers, my /boot had the proper files (vmlinuz-linux, initramfs-linux.img).
6. Regenerated the GRUB config again
This time the command finally said:
Found linux image: /boot/vmlinuz-linux
Found initrd image: /boot/initramfs-linux.img
Found Windows Boot Manager ...
After a few reboots and some sweat, I was finally greeted not by grub rescue> but by my Arch login screen. 🎉
3. The Lessons Learned
Don’t panic when you see a broken bootloader. Most of the time, it’s fixable with a live USB and a bit of patience.
Always keep a live USB around. It’s like carrying a spare tire. You hope you never need it, but when you do, you’re glad it’s there.
Know which bootloader you’re actually using. GRUB and systemd-boot are not the same thing. You can check which one you’re using by running bootctl status (for systemd-boot) or looking for /boot/grub/ directory (for GRUB). Installing one on top of the other without realizing it is a recipe for disaster.
Back up configs before changing them. My mistake came from copy-pasting commands without double-checking if they applied to my setup. A quick backup would have saved me some trouble.
Read error messages carefully. The nvidia_drm error I was trying to fix was likely unrelated to my bootloader choice and probably had a simpler solution.
Conclusion
Now I’m back on Arch, Hyprland is running beautifully with its tiling window management and smooth animations, and I finally feel like I have a desktop environment that makes me want to spend more time in Linux rather than booting back to Windows. Plus, I got a fun war story out of it!
The whole experience taught me that Linux problems, while sometimes scary-looking, are usually solvable with the right approach and tools. The community documentation and live USB environments make recovery possible even when things go completely sideways.
If you ever see grub rescue> blinking back at you, don’t panic. Grab a live USB, breathe, and remember: you’re just one chroot away from salvation. Welcome to the Linux club!
Bonus: What Those Commands Actually Did
Here’s the rescue flow in one line:
Live USB → Mount partitions → Enter Arch with chroot → Reinstall GRUB + Kernel → Reboot.
If you’re curious about the nitty-gritty technical details, here’s a breakdown of the commands I ran during the rescue mission.
Mounting the partitions
sudo mount /dev/sdc2 /mntMount the main Linux partition (where Arch is installed) to /mnt. This is the root filesystem of your OS.
sudo mount /dev/sdc1 /mnt/boot/efiMount the EFI partition inside /mnt/boot/efi. This is where the bootloader files live.
Preparing the chroot
for dir in /dev /proc /sys /run; do sudo mount --bind $dir /mnt$dir; doneMounts essential system directories (devices, processes, system info, runtime data) so the chrooted system works properly. Without this, many commands wouldn’t function.
Entering the system (chroot)
sudo chroot /mntChanges the root of the shell to /mnt, so it feels like you’ve booted into your installed Arch Linux even though you’re inside the live USB.
Reinstalling GRUB
grub-install --target=x86_64-efi --efi-directory=/boot/efi --bootloader-id=GRUBReinstalls GRUB into the EFI partition with the identifier “GRUB.” This creates the EFI entry that your firmware can use to boot.
Regenerating GRUB configuration
grub-mkconfig -o /boot/grub/grub.cfgScans the system for installed kernels and operating systems (including Windows), then generates a new GRUB menu.
Reinstalling the Linux kernel
pacman -S linux linux-headersInstalls the latest Linux kernel and its headers. This puts back files like /boot/vmlinuz-linux and /boot/initramfs-linux.img that GRUB needs to boot Linux.
Exiting the chroot and cleaning up
exit
sudo umount -R /mnt
rebootexit: leave the chrootumount -R /mnt: unmount everything that was mounted under/mntreboot: restart the machine and (hopefully) boot into your shiny repaired Arch Linux
And that’s the whole surgery!